はじめに
jupyter notebookでは、ipywidgetsというライブラリを使用することで、インタラクティブな要素を追加することができます。本記事では、IntRangeSliderというウィジェットを使って、画像の任意の位置に四角形を表示し、その位置や大きさをインタラクティブに調整する方法について解説します。この技術は画像処理や視覚的なデータ分析において非常に便利です。
コード
解説
モジュールのインポートなど
バージョン
データの生成
画像データは下記記事と同じコードにより生成しました。
画像の表示
四角の表示
左下の座標が(0, 0)で幅0、高さ0のRectangleオブジェクトを作成し、ax.add_patch(rects)で図に追加しておきます。
ipywidgetsの設定
IntRangeSliderの設定
IntRangeSliderでは整数の範囲を指定できます。minは最小値、maxは最大値、stepは刻み幅、valueは初期値となります。descriptionを使用するとスライダーの前にラベルを付けることができ、orientation=’horizontal’で水平方向、’vertical’で垂直方向にスライダーを設置できます。
x_limとy_limのスライダーで選択した範囲に四角を表示するために、四角の左下位置をset_xyで設定し、幅をset_width、高さをset_heightで設定します。
IntRangeSliderの表示
interactではなく、interactiveを用います。interactiveを使用することでHBox(children=[y_range,x_range])などのようにipywidgetsのレイアウト変更が可能になります。HBoxを使うと、ウィジェットが横方向に並びます。
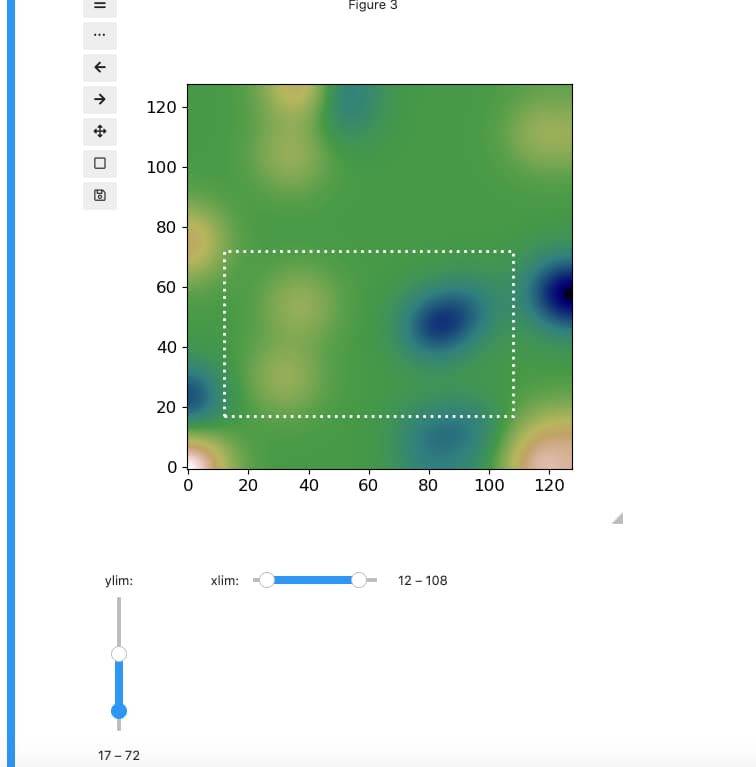
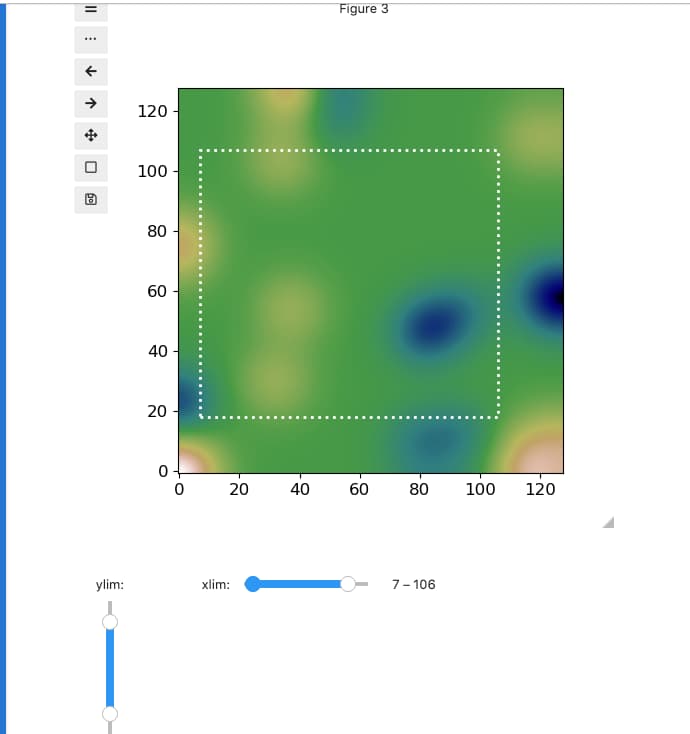
x_lim、y_limを変化させたときの画像の変化

まとめ
本記事では、jupyter notebookでipywidgetsのIntRangeSliderを使用して、画像上に四角形をインタラクティブに表示・調整する方法を解説しました。この手法により、画像処理や分析において特定の領域を視覚的に強調したり、注目したい部分を動的に変更したりすることが可能になります。IntRangeSliderの活用は、データの視覚的な探索や教育目的の説明において非常に効果的なツールとなるでしょう。
参考


コメント